
Guide to Soldering for Beginners
Soldering electronics tutorial reveals essential techniques for beginners and enthusiasts alike. Dive in to elevate your skills!
Soldering is essential in various industries, including electronics, automotive, and medical fields, as it provides reliable connections for components in devices and systems.
Soldering electronics tutorial opens the door to a world of electronics craftsmanship. Have you ever wondered how those tiny components connect to create complex devices? Let’s explore the essentials you need to get started.
Understanding the basics of soldering
Understanding the basics of soldering is crucial for anyone looking to dive into electronics projects. Soldering is a process that involves melting a filler metal to join together electronic components. This technique is fundamental in creating reliable electrical connections in circuits.
The filler metal, known as solder, typically comprises tin and lead, or can be lead-free for a more eco-friendly approach. Using the right solder is essential for achieving strong and efficient connections.
The Importance of a Good Soldering Iron
A quality soldering iron is important. It should heat quickly and maintain a steady temperature to ensure effective soldering. Choose a soldering iron with adjustable temperature settings tailored to different types of components and materials.
Preparing Your Workspace
Before starting, set up a clean and organized workspace. Ensure adequate lighting and ventilation, as soldering can produce fumes that are best avoided. Gather all necessary tools, including safety goggles, solder, and a wet sponge for cleaning the iron tip.
Basic Soldering Technique
To perform the actual soldering, hold the soldering iron like a pen. Heat the connection point for a second before adding solder, allowing it to flow smoothly around the joint. Remove the iron and let the solder cool naturally to create a strong connection.
Practice is key in mastering soldering, so don’t hesitate to experiment with different components and techniques. Having a clear understanding of these basics will prepare you well for more advanced soldering projects in the future.
Essential soldering tools and materials
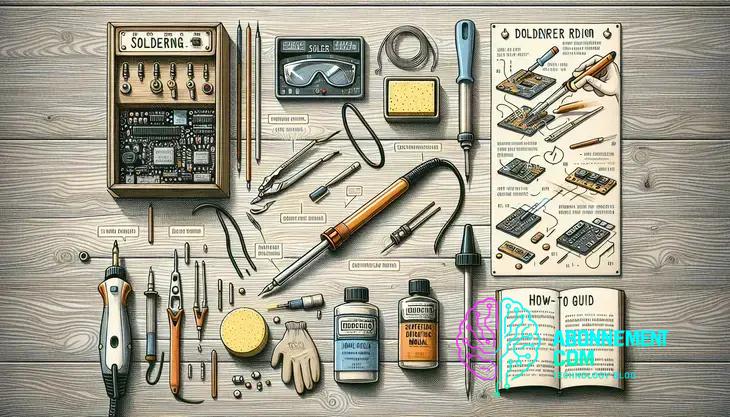
To achieve successful results in soldering, it is crucial to have the right tools and materials. Here are the essentials that every beginner should consider when starting their soldering journey.
Soldering Iron
The soldering iron is the primary tool for any soldering project. It should have a suitable wattage, typically between 20 to 60 watts, and a fine tip for precision work. Look for a model that heats up quickly and maintains consistent temperature.
Solder
There are different types of solder, with the most common being a mix of tin and lead or lead-free alternatives. For electronics, use rosin core solder, as it contains a flux that helps the solder flow and adhere to the surfaces.
Soldering Iron Stand
A soldering iron stand is essential for safely placing your iron when not in use. Many stands come with a cleaning sponge, which is important for keeping the soldering tip clean and free of debris.
Wire Cutters
Wire cutters are necessary for trimming excess wire after soldering components. Ensure they are sharp and durable for precision cutting.
Safety Goggles
Protective safety goggles are important to shield your eyes from any solder splashes or fumes generated during the process. Prioritizing safety while soldering is crucial.
Desoldering Tools
Accidents happen, so having desoldering tools like a solder sucker or desoldering braid is useful for correcting mistakes. These tools help remove unwanted solder from connections.
By ensuring you have these essential tools and materials, you’ll set yourself up for success in your soldering projects.
Safety precautions for soldering
When it comes to soldering, safety should be your top priority. Following the right precautions ensures a safe working environment and helps prevent accidents or injuries. Here are some essential safety precautions to keep in mind.
Wear Protective Gear
Always wear safety goggles to protect your eyes from solder splashes and harmful fumes. Additionally, consider wearing a mask to filter out fumes produced during the soldering process. Wearing gloves can also prevent burns from hot equipment.
Work in a Well-Ventilated Area
Ensure your soldering workspace is well-ventilated. This helps to dissipate any harmful fumes and keeps air quality safe. If possible, work near an open window or use an exhaust fan to improve airflow.
Use a Stable Work Surface
Always solder on a stable and heat-resistant work surface. Avoid using flammable materials nearby, as soldering can produce high heat that might ignite them. A designated soldering mat is a great investment.
Keep Tools Organized
Maintain an organized workspace. Keep all tools and components within reach to avoid reaching over hot surfaces. This reduces the risk of accidental burns or dropping tools.
Be Aware of Hot Surfaces
Remember that the soldering iron can reach very high temperatures. Always place it on its stand when not in use, and avoid touching the tip or any melted solder.
Follow Manufacturer Instructions
Always read the manufacturer instructions for your soldering tools and materials. This ensures proper use and helps you understand any specific safety information related to the products you are using.
By following these safety precautions, you can enjoy soldering while minimizing risks and ensuring a safe environment.
Step-by-step guide to soldering circuits
Following a step-by-step guide can make soldering circuits easier and more effective. Here’s how you can successfully solder your electronic components.
Step 1: Gather Your Materials
Before you start, gather all materials including your soldering iron, solder, wire cutters, and the components you will be soldering. Ensure your workspace is organized and safe.
Step 2: Preheat the Soldering Iron
Plug in your soldering iron and let it preheat for a few minutes. This ensures that it reaches the right temperature for smooth soldering. Use a damp sponge to clean the tip before use.
Step 3: Position the Components
Insert the leads of the electronic components into the holes of the circuit board. Make sure they sit flat against the board. You can use tape to hold components if necessary.
Step 4: Heat the Connection
Place the tip of the soldering iron against the junction where the component lead and the circuit board meet. Hold it there for about one second to heat the connection.
Step 5: Apply Solder
While keeping the soldering iron in place, feed solder into the joint. The solder should melt and flow smoothly around the lead and pad, creating a strong electrical connection.
Step 6: Remove the Iron
After applying enough solder, quickly remove the soldering iron and allow the solder to cool. Avoid moving the joint until it has hardened to ensure a secure connection.
Step 7: Trim Excess Leads
Use the wire cutters to trim any excess wire leads sticking out from the solder joint. Be careful not to cut too close to the board.
Step 8: Inspect Your Work
Finally, inspect your solder joints. They should be shiny and have a volcano-like shape. If a joint looks dull or cracked, it may need rework.
Following these steps will help you master the soldering process and create reliable circuit connections.
Common soldering techniques explained
Understanding common soldering techniques is vital for achieving strong, reliable connections in your electronic projects. Here are some widely used techniques that every beginner should know.
Through-Hole Soldering
This technique involves inserting component leads through holes in a circuit board. The leads are then soldered on the underside of the board. It is commonly used for larger components like resistors and capacitors. Make sure to heat the joint evenly to ensure a solid connection.
Surface Mount Soldering
Surface mount technology (SMT) allows components to be mounted directly on the surface of the circuit board rather than through holes. This technique is used for smaller components and requires careful placement and soldering, often using solder paste and a reflow oven.
Cold Solder Joint Technique
A cold solder joint occurs when the solder does not flow properly. This can lead to poor connections. To avoid this, ensure the components and soldering iron are properly heated before applying solder. Cold joints can often be fixed by reheating the area and adding more solder.
Wave Soldering
This automated process is used in mass production, where the PCB passes over a wave of molten solder. The solder fills the holes and creates connections with components. This technique is efficient, especially for high-volume production.
Hand Soldering
Hand soldering is the most common technique for hobbyists. It allows for precise control and is great for small batches or individual projects. With a good soldering iron and practice, hand soldering becomes easier and more effective.
Rework Techniques
Sometimes, soldering errors occur. Rework techniques such as using a solder sucker or desoldering braid help fix these mistakes. Understanding how to effectively remove excess solder is important for maintaining clean connections.
By mastering these techniques, you will improve your soldering skills and create durable electronic connections that last.
Troubleshooting soldering issues
When soldering, you may encounter various issues that can affect the quality of your connections. Understanding how to troubleshoot these soldering problems is key to achieving reliable results. Here are some common soldering issues and their solutions.
Cold Joints
A cold joint occurs when the solder does not flow properly, resulting in a weak connection. This often looks dull and is not shiny. To fix a cold joint, reheating the connection while adding a little more solder can help create a stronger bond.
Excess Solder
Using too much solder can create a solder blob, which can cause short circuits. If you notice excess solder, you can use a solder sucker or desoldering braid to remove it. Be careful not to damage the circuit board while doing this.
Insufficient Heating
If your solder isn’t melting properly, it could be due to insufficient heating. Make sure to let your soldering iron reach the right temperature before you start. If it’s still not working, check if the iron is clean and the tip is in good condition.
Lifted Pads
A lifted pad occurs when the pad on the circuit board comes off during soldering, often caused by excessive heat. If you lift a pad, you may need to repair it by carefully adding a jumper wire to connect the component lead directly to the trace on the board.
Flux Issues
Using the wrong type of flux or not using any flux can lead to solder not adhering properly. Ensure you are using the correct type of flux for your soldering task. For most PCB work, rosin core solder is an effective choice.
Not Enough Solder
If you find that your connections are too weak, it might be due to not using enough solder. Make sure to apply sufficient solder to cover the junction without creating excessive lumps. Adding solder gradually helps.
By learning how to troubleshoot these common soldering issues, you can improve your skills and ensure that your electronic projects are successful and reliable.
Maintaining your soldering tools
Taking care of your soldering tools is essential for ensuring their longevity and efficiency. Proper maintenance practices can help you achieve better results in your soldering projects. Here are some effective tips for keeping your tools in great shape.
Cleaning the Soldering Iron Tip
After each use, clean the soldering iron tip using a damp sponge or a brass sponge. This removes excess solder and prevents oxidation. A clean tip ensures optimal heat transfer and prevents poor solder connections.
Regularly Inspecting Your Tools
Periodically inspect your tools for any signs of damage or wear. Check the soldering iron for cracks, bent tips, or frayed cords. Replace any damaged parts immediately to avoid accidents and ensure safety.
Storing Properly
Store your soldering iron in a dedicated stand when not in use. This prevents it from rolling off surfaces and potentially causing burns or damage. Additionally, keep tools organized in a toolbox to avoid misplacing them.
Replacing Old or Worn Tips
If the soldering iron tip becomes dirty or worn, replace it with a new one. Worn tips can lead to poor soldering performance and can be difficult to clean. Choose tips that fit your soldering iron model for best results.
Using the Correct Type of Solder
Ensure you are using the right type of solder for your projects. Using the wrong solder can lead to residue buildup on your tools. For electronics, a rosin-core solder is often recommended.
Staying Safe with Electrical Maintenance
When maintaining your soldering tools, always unplug the soldering iron before performing any cleaning or maintenance. This ensures safety and reduces the risk of accidental burns or electrical shock.
By implementing these maintenance tips, you can extend the life of your soldering tools and improve the quality of your soldering projects.
Advanced soldering techniques
Once you have mastered the basics of soldering, you may want to explore advanced soldering techniques to enhance your skills and tackle more complex projects. Here are some techniques that can elevate your soldering abilities.
Reflow Soldering
Reflow soldering is a technique often used for surface mount components. It involves applying solder paste to the PCB pads, placing components on top, and then heating the entire board, allowing the solder to flow and create connections. This technique is efficient for mass production and requires a reflow oven or a hot air tool.
Jumper Wires
Using jumper wires allows you to connect components across a circuit board without extensive soldering. This technique is useful for prototyping and testing circuit designs. You can easily remove or modify connections without damaging the board.
Point-to-Point Soldering
Point-to-point soldering is a technique where each connection is made individually without using a circuit board. This method is commonly used in vintage electronics and requires careful attention to wire placement and connection strength. It can lead to a cleaner and more visually appealing design.
Wave Soldering
Wave soldering is an automated process often used in high-volume manufacturing. In this technique, the PCB is passed over a wave of molten solder. The solder attaches to the leads as the board passes through, creating reliable connections quickly. This method minimizes human error and speeds up production.
Use of Flux
Utilizing the correct type of flux is essential for advanced soldering techniques. Flux helps the solder flow and adhere properly to surfaces. Learning to apply flux appropriately can greatly improve the strength and appearance of your solder joints.
Desoldering Techniques
Knowing how to effectively desolder is another advanced skill. Techniques such as using a solder wick or a desoldering pump are useful for removing solder from joints without damaging the components. This skill is essential when correcting errors or repairing circuits.
Mastering these advanced soldering techniques will not only enhance your soldering skills but also allow you to take on more ambitious and complex electronic projects with confidence.
Real-world applications of soldering
Soldering is a crucial skill used in various industries and applications. Understanding the real-world applications of soldering can help you appreciate its importance in technology and everyday life. Here are some key areas where soldering plays a vital role.
Electronics Manufacturing
In the electronics industry, soldering is fundamental for assembling circuit boards. It is used to connect components like resistors, capacitors, and microchips. Without soldering, many of the devices we use daily, from smartphones to computers, would not function properly.
Automotive Industry
Soldering techniques are commonly used in the automotive industry for assembling electronic components in vehicles. This includes wiring for sensors, dashboards, and automated systems. Reliable soldering ensures vehicle safety and functionality.
Repair and Maintenance
Many people use soldering for repairing electronic devices. From fixing broken connections in gadgets to repairing household appliances, soldering enables effective repairs that save resources and extend product life.
Telecommunications
In telecommunications, soldering connects various components within communication devices, such as routers and switches. These reliable connections are crucial for transmitting signals and maintaining effective communication networks.
DIY Projects
Hobbyists frequently use soldering in DIY projects, such as building custom electronics or kits. It enables creators to bring their ideas to life, whether they are making home automation systems or experimental devices.
Robotics
Robotics benefits greatly from soldering techniques. Assembling robot controls and circuits requires precise soldering to ensure that all components work seamlessly together. Proper soldering is essential for effective communication between various parts of a robot.
Medical Devices
Soldering is also essential in the manufacture of medical devices. Critical components in devices such as pacemakers or diagnostic equipment rely on strong solder connections for reliability and performance, affecting patient safety.
These applications illustrate the importance of soldering in various fields. Mastering this technique can open up numerous opportunities across diverse industries.
In summary, mastering soldering is essential for various applications
Soldering is a vital skill not just for professionals but also for hobbyists and DIY enthusiasts. Whether it’s in electronics manufacturing, automotive repairs, or medical devices, soldering plays a crucial role in connecting components reliably.
By learning basic and advanced techniques, you can improve your skills and handle a wide range of projects. Proper maintenance of your tools ensures that you have the best results in your work. Understanding the real-world applications of soldering highlights its significance across many industries.
Embrace the art of soldering, and you will open doors to exciting opportunities in technology and innovation.


